구글 시트에 새로운 데이터가 추가되면 슬랙 채널 메시지로 알림을 받아볼 수 있는 기능을 구현해보자. 슬랙의 추가 기능인 인커밍 웹훅(Incoming Webhook)과 구글 시트의 추가 기능인 앱스 스크립트(Apps Script)를 활용하면 이와 같은 기능을 쉽게 구현할 수 있다. 단, 인커밍 웹훅을 앱스 스크립트와 직접 연동해도 되지만, REST API 서버를 같이 사용해도 좋다. 이 설명에서는 FastAPI를 이용해 구현한 API 서버를 활용할 것이다.
슬랙 인커밍 웹훅(Slack Incoming Webhook)
슬랙 인커밍 웹훅(Slack Incoming Webhook)은 외부에서 REST API 요청 시 메시지를 특정 슬랙 채널에 전송할 수 있는 기능이다. 이 기능을 사용하려면 슬랙 앱(Slack App)을 만들고 이를 슬랙 워크스페이스에 설치해야 한다. 슬랙 앱 생성, 인커밍 웹훅 설정 그리고 포스트맨(Postman)을 이용한 테스트를 진행해보자.
슬랙 앱(Slack App) 생성
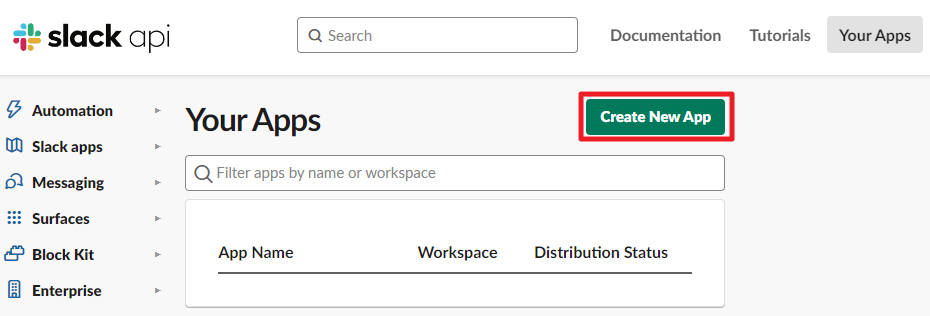
슬랙 앱(https://api.slack.com/apps) 접속 후 로그인한다. Your Apps에서 Create New App 버튼을 클릭한다.
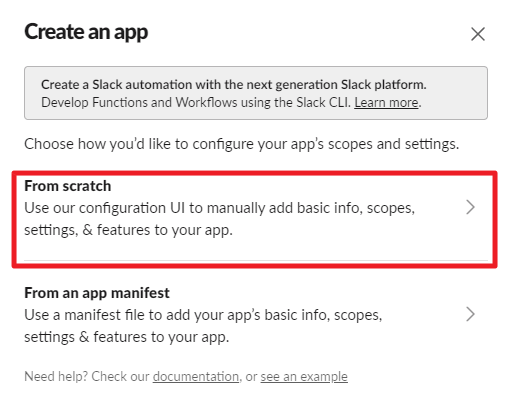
From scratch를 클릭한다.
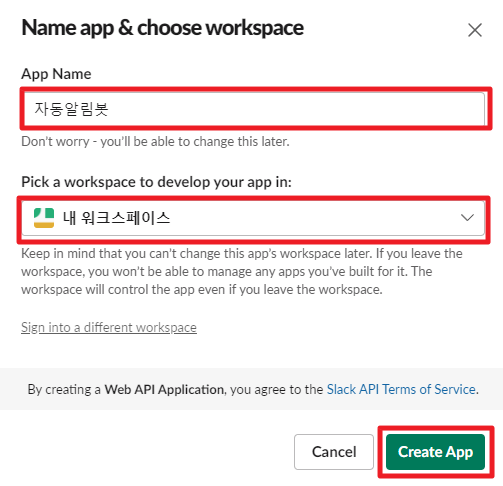
앱 이름을 작성하고, 슬랙 앱을 설치할 워크스페이스를 선택 후 Create App 버튼을 클릭한다.
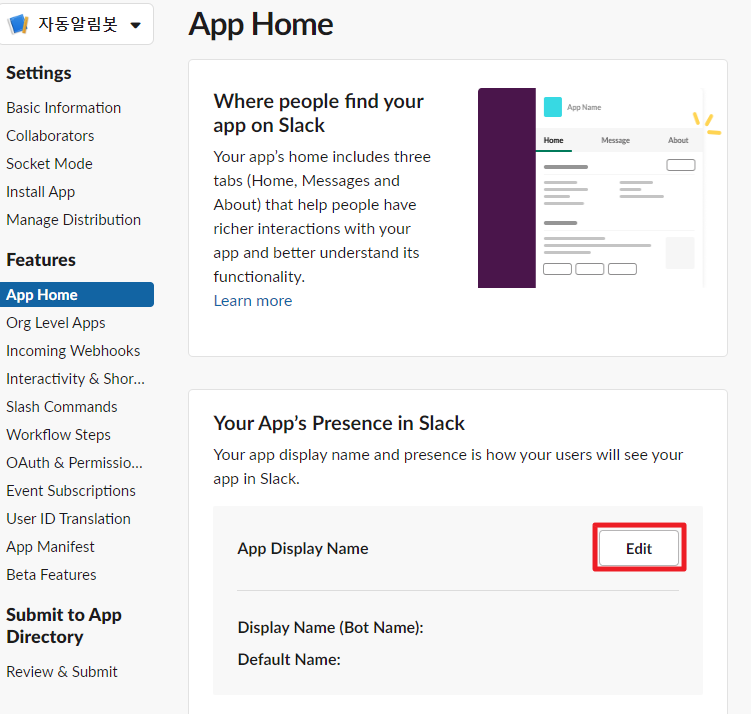
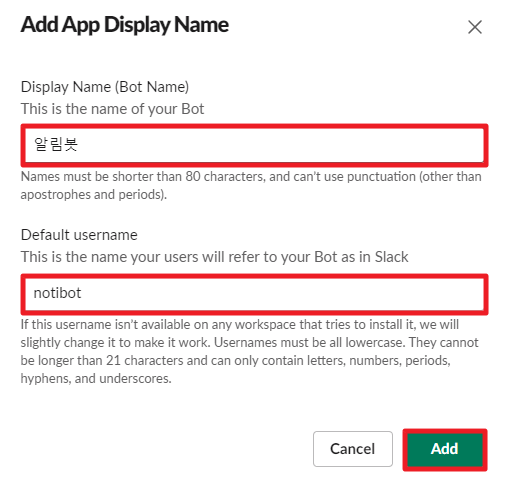
좌측 메뉴에서 App Home을 클릭하고, Your Apps’s Presence in Slack에서 App Display Name의 Edit 버튼을 클릭한다.
봇 이름과 유저명 기본값을 입력하고 Add 버튼을 클릭한다.
인커밍 웹훅 설정
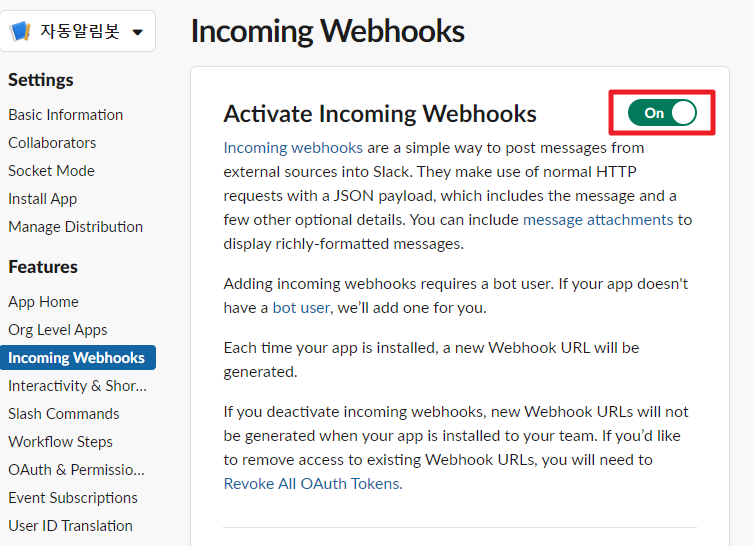
좌측 메뉴에서 Incoming Webhooks를 클릭하고, Activate Incoming Webhooks를 활성화(On)한다.
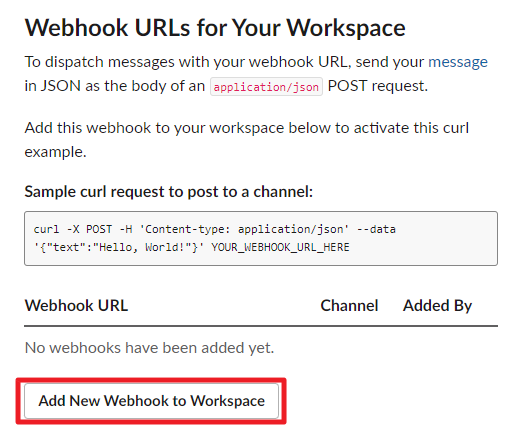
화면 하단의 Webhook URLs for Your Workspace에서 Add New Webhook to Workspace를 클릭한다.
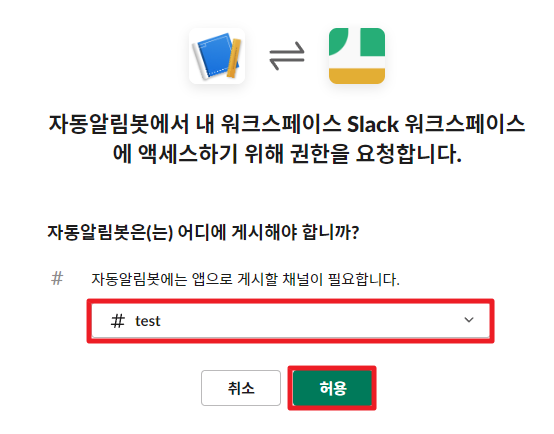
슬랙 앱을 추가할 채널을 선택한 후 허용 버튼을 클릭한다.
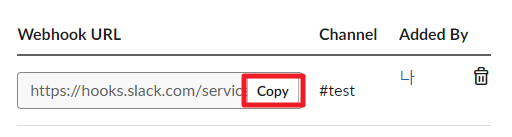
Webhook URL을 복사한다.
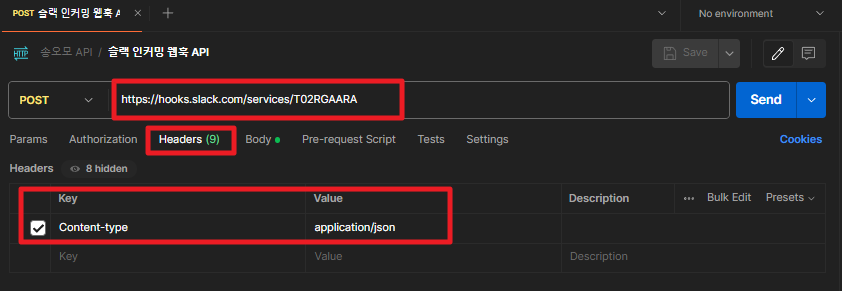
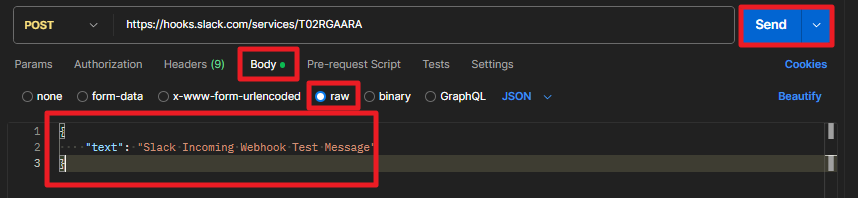
포스트맨(Postman)으로 슬랙 인커밍 웹훅 테스트

FastAPI
아래와 같이 FastAPI를 이용해 간단한 API를 구현한다. 이 API는 구글시트에 새 데이터가 추가될 경우 호출된다. API 호출 시 구글시트에 추가된 데이터를 넘겨받아 슬랙 인커밍 웹훅 호출 시 이 값들을 적절히 가공해서 넘겨주는 역할을 한다. 자세한 API 작성 및 구동 방법은 설명을 생략한다.
import requests
from fastapi import FastAPI, HTTPException, Request

@router.post("/slack")
async def notice_new_order(request: Request):

    URL = "https://<Incoming Webhook URL>"

    data = await request.json()

    data = data['data']
    params = {
        "이름": data.get("이름"),
        "전화번호": data.get("전화번호"),
        "이메일": data.get("이메일"),
    }

    message = f"*구글시트 새 데이터 추가 알림\\n\\n"
    for key, value in params.items():
        message += f"- {key}: *{value}*\\n"

    headers = {"Content-Type": "application/json"}
    payload = {"text": message}
    response = requests.post(URL, headers=headers, json=payload)

    return {"status": "success", "message": "Data processed successfully"}
구글 시트(Google Sheet)
구글 시트에 새로운 데이터가 추가되면 자동으로 슬랙 알림이 되게 설정해보자. 이 과정에서 구글 시트의 확장 프로그램인 앱스 스크립트(Apps Script)를 이용할 것이다.
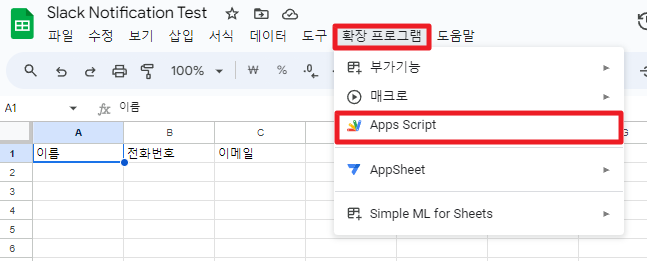
Apps Script 실행
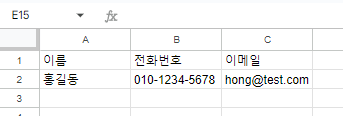
구글 시트에 이름, 전화번호, 이메일과 같이 적당한 컬럼명을 입력한다. 그 다음 메뉴에서 확장 프로그램 – Apps Script를 선택한다.
자동화 스크립트(Script) 작성
다음과 같이 코드를 작성한다.

let url = "<API 엔드포인트 URL>/slack";

function onChange(e) {
  var sheet = SpreadsheetApp.getActiveSpreadsheet().getActiveSheet();
  var headers = sheet.getRange(1, 1, 1, sheet.getLastColumn()).getValues()[0];
  var lastRow = sheet.getRange(sheet.getLastRow(), 1, 1, sheet.getLastColumn()).getValues()[0];
  callRestApi(headers, lastRow);
}

function callRestApi(headers, dataRow) {
  var dataObject = {};

  for (var i = 0; i < headers.length; i++) {
    dataObject[headers[i]] = dataRow[i];
  }

  var options = {
    'method': 'post',
    'contentType': 'application/json',
    'payload': JSON.stringify({data: dataObject})
  };

  try {
    var response = UrlFetchApp.fetch(url, options);
    Logger.log("API 응답: " + response.getContentText());
  } catch (error) {
    Logger.log("API 호출 중 오류 발생: " + error.toString());
  }
}
트리거 설정
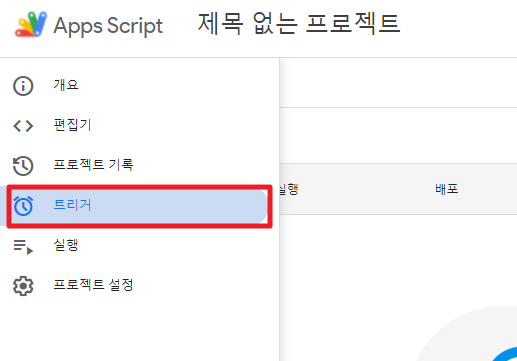
앱스 스크립트의 좌측 메뉴에서 트리거를 선택한다.
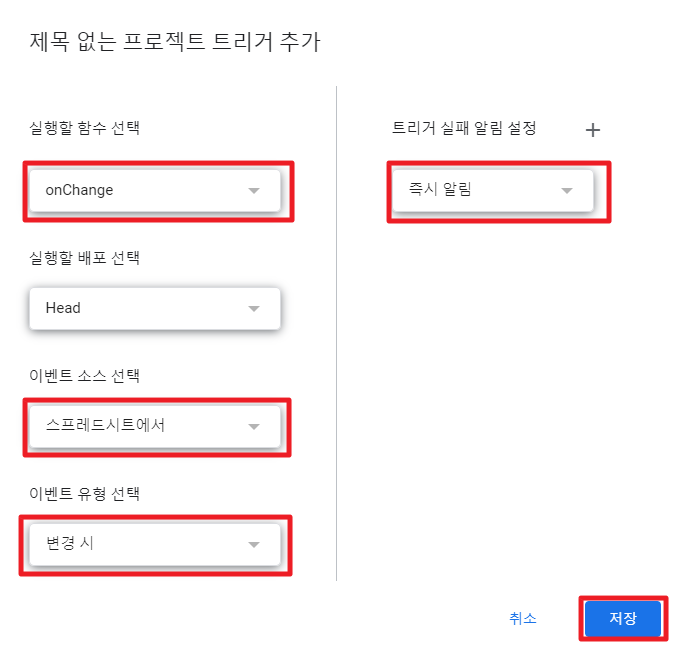
다음과 같이 트리거를 추가한다.
구글 시트에 데이터 추가
다음과 같이 구글 시트에 데이터를 추가해본다.
데이터가 추가되면 다음과 같이 슬랙 채널에 알림이 온다.
